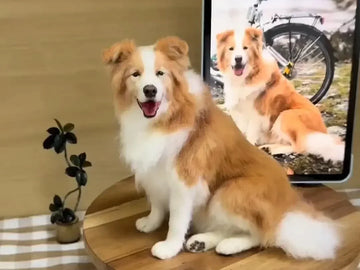
In this hands-on tutorial we deconstruct a flat (non-3D) glass oil portrait of a white French Bulldog into nine clear images and steps. You’ll learn why eye-distance is the most reliable anchor for proportion, how to build believable white fur on glass, and how to finish and protect your piece so it stays luminous for years.
Why Paint on Glass (vs. Canvas)?
Glass offers optical depth. Thin color veils suspended on a transparent plate feel luminous, especially around eyes and moist features. On a white-coated breed like a French Bulldog, glass helps you separate gentle shadow temperatures without chalky build-up.
Tools & Materials
- Acrylic (plexiglass) or glass plate — 2–4 mm thick; edges sanded.
- Fine liner/Chinese gōuxiàn brush — for folds, whiskers, short fur.
- Acrylic paints for fast, clean layering; optional oil glazes later on fully dry acrylic.
- Isopropyl alcohol + lint-free cloth — degrease surface.
- Low-tack tape, soft pencil/erase marker — back-side guiding marks.
- Clear acrylic medium / isolation coat — between stages if mixing media.
- Final varnish / fixative — to unify sheen and protect.
Prep & Workspace
Wipe the plate with alcohol, handle by edges. Place the printed reference beneath the plate (or behind, if you prefer reverse painting) and tape it. Set a neutral pad under your plate so color reads correctly.
9 Steps with 9 Images (French Bulldog Demo)
What you do: Measure the inter-ocular distance (pupil-to-pupil) on your reference and transfer it to the plate. Use it to place eye ellipses and the head oval. Sketch the outer silhouette lightly; wash a very thin neutral base behind the silhouette to set overall tone.

What you do: Block in nostril shapes and mouth line in mid-value neutral. Step back and compare: eye line, nose base line, mouth arc, and ear base heights should match the photo. Adjust now; it’s cheap to fix here.

What you do: Lay the inner-ear pink with a transparent, warm mix (a touch of red + white + hint of yellow). Cool the outer rim with a soft, bluish gray. Keep the transition feathery; bulldog ears are firm but light-transmissive.

What you do: Map nasal folds with semi-transparent strokes. Shade under the brow rolls and along the muzzle plane change. Keep strokes short, directional, and thin—glass loves restraint.

What you do: Establish mouth creases with a mid-dark warmth (brown-rose). Immediately halo each crease with a softer, lighter note to create the illusion of raised skin beside a groove. It’s volume, not outlines, that makes bulldog mouths convincing.

What you do: Deepen cast shadow under the lip and in the corner of the mouth with a cool-leaning neutral (blue-gray). Feather into mid-tones while still wet, keeping the core darkest spot small and purposeful.

What you do: Block neck mass in cool mid-grays; add warmer reflected lights near the chest. Suggest fur direction with short, pressure-varied strokes. Reserve pure white for 3–5 tiny speculars only.

What you do: Photograph your piece and compare side-by-side with the reference on screen. Nudge symmetry, soften any edgy transitions, brighten the eye catchlight, and unify ear tones. Let the plate sit dust-free for a partial cure.

What you do: When fully dry, apply a compatible isolation coat if you mixed media, then a clear varnish to unify sheen. Mount with spacers so paint doesn’t touch other surfaces; frame simply to let the glass glow.

Common Pitfalls & Quick Fixes
- Chalky white fur: You used pure white too early. Glaze a hair-thin cool gray over broad areas; re-add tiny bright accents last.
- Muddy mouth shadows: Over-blending. Scrape back lightly with a plastic blade; repaint with two decisive passes (mid-dark, then a softened edge).
- “Sticker” ears: Hard outlines all around. Lose the ear’s far edge into background temperature, keep only one crisp edge.
- Dead eyes: Pupil not dark enough or catchlight misplaced. Deepen the pupil core and place a single, crisp catchlight consistent with your main light.
Pro Tips, Mini Drills & Checklists
Mini Drills
- 3-value bulldog: Paint your bulldog in just shadow/mid/light on scrap glass. If it reads, details will sing later.
- Ear temperature strip: Make a 1×4″ strip from warm pink to cool gray; reference it while painting ears.
- One-pull whiskers: Practice single, slightly arced whisker pulls with thinned paint; no re-tracing.
Pre-Paint Checklist
- Reference cleaned and taped under plate.
- Eye distance measured and transferred accurately.
- White-fur value string mixed (cool/warm grays + near-white).
- Room dust minimized; drying shelf prepared.
- Framing plan (spacers, backer) decided early.
Display & Care on Glass
Keep away from steam and direct sun. Dust with a soft microfiber; never use ammonia on painted areas. If framing, use spacers so the painted surface never touches glazing or backing.
FAQ
Do I have to use oils on glass, or can I use acrylics?
Acrylics are excellent for flat glass portraits because they dry fast and layer cleanly. If you want the glow of oils, add thin oil glazes only after the acrylic layer is fully dry and isolated with a compatible clear coat.
How do I keep white fur from looking flat on glass?
Build a family of near-grays (cool and warm) and reserve pure white for tiny, directed highlights. Shape the form with temperature, not just value jumps.
What size plate is good for a first portrait?
8×10″ or 9×12″ keeps eyes large enough for detail without overwhelming your brush control. For two pets, consider 11×14″.
How long should I wait before sealing?
Until the paint is fully dry to the touch and no color lifts with a clean fingertip. Acrylic can be ready in days; oil glazes need longer. Always follow the varnish manufacturer’s guidance.
Can I include multiple pets in one flat glass portrait?
Yes—just keep light direction and camera height consistent across references, and test composition with thumbnails before committing.
Closing Thoughts
Flat glass portraits reward patience and subtlety. By anchoring proportions with eye distance, layering color sparingly, and letting glass amplify light, you can create a bulldog (or any companion) that feels present, not posed. Whether you paint your own or study handcrafted examples from PetDecorArt, the goal is the same: honor a bond with depth, light, and care.
