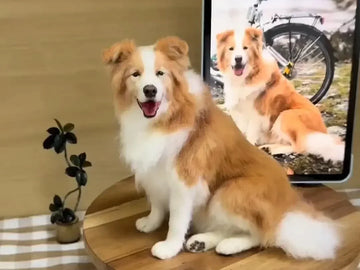
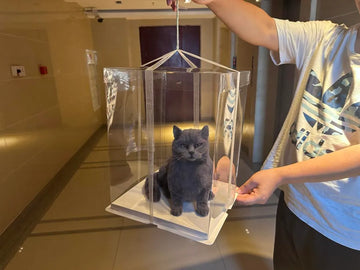
A complete guide to sculpting cat ears from polymer clay and enhancing them with wool needle felting for a lifelike furry effect.
Introduction
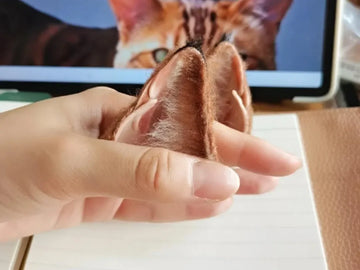
For pet art enthusiasts and crafters, combining different techniques often leads to the most stunning results. One example is making realistic cat ears by blending polymer clay sculpting with wool needle felting. The clay provides a strong, detailed base, while the wool adds the soft, furry texture that makes the ears look alive.
This hybrid method is popular among artists who specialize in lifelike animal miniatures and pet memorial crafts. It’s also closely related to the world of custom wool felt pet replicas, where realistic details bring comfort and joy to pet lovers.
Materials You’ll Need
Before starting, gather all necessary materials. Working with both clay and wool requires a mixed set of tools:
- Polymer Clay: Neutral colors like beige, gray, or white.
- Sculpting Tools: Blades, ball styluses, and silicone shapers.
- Baking Surface: Ceramic tile or parchment paper for curing clay.
- Wool Roving: Soft merino or natural wool in shades matching your pet’s fur.
- Felting Needles: Medium-gauge for attaching fibers; fine-gauge for detailing.
- Acrylic Paints: For subtle inner ear coloring.
- Reference Photos: High-quality pictures of real cat ears for accuracy.
If you’ve seen our hamster and ferret wool replicas, you’ll know how much difference wool textures make in realism — the same applies here with ears.

Step 1: Sculpting the Polymer Clay Base
The foundation of your ear starts with polymer clay. Condition the clay by kneading until soft, then form two identical triangular shapes. Each triangle should be slightly curved inward to mimic natural feline anatomy.
Tips for Realism:
- Use your fingers to round off the edges — real cat ears are never perfectly sharp.
- Press a ball stylus inside the ear to create a natural concave surface.
- Keep symmetry by shaping both ears at once.
Don’t worry about fur texture at this stage — the surface should remain smooth since wool fibers will later be added for realism.
Step 2: Baking and Hardening the Clay
After shaping your cat ears, it’s time to cure the polymer clay so it becomes a sturdy base for felting. Place the ears on parchment paper or a ceramic tile to avoid burning. Bake according to the instructions of your clay brand — typically at 110–130°C (230–265°F) for 15–25 minutes depending on size.
Once cooled, the clay should feel solid and ready for the next stage. The smooth back will provide the perfect foundation for attaching wool fibers later.

Step 3: Wool Needle Felting on the Back
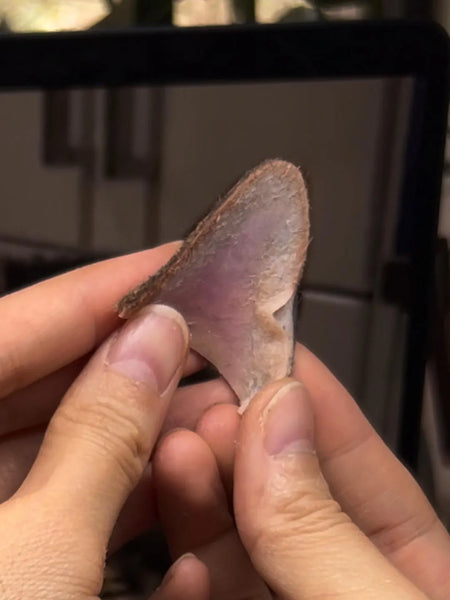
This is the transformative stage where your ears shift from simple clay shapes to lifelike replicas. Using wool roving and felting needles, you’ll implant fibers into the clay’s surface or a thin felt backing adhered to the clay.
How to Felt the Back of the Ear:
- Apply a thin layer of wool in a matching color to the clay base.
- Use medium-gauge felting needles to poke the wool gently into the clay surface or into a glued-on felt pad.
- Build up layers gradually, blending colors (white, gray, or brown) for a natural fur gradient.
- Switch to fine-gauge needles for smoothing and detailing.
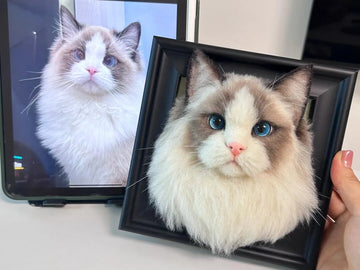
This wool layer mimics the softness of real cat ears and enhances realism. The technique is very similar to how stuffed animal clones with frames combine sculpted shapes with wool fibers for lifelike finishes.
Step 4: Painting and Finishing Touches
After felting, add final paint details to the inner ear. A dry brush of soft pink or beige creates a natural skin tone. Use diluted acrylics or pastels for shading, giving depth to folds and edges. Finish with a protective varnish on the clay portion — leave the wool unsealed to maintain softness.
Optional details like tiny hair tufts at the ear tips can be added by attaching extra strands of wool, blending them seamlessly into the felted base.
Creative Applications
Once completed, these polymer clay and wool cat ears can be used for:
- Cosplay and Costume Design: Lightweight, realistic ears for headbands or clips.
- Art Dolls: Enhancing custom doll projects with feline features.
- Pet Memorials: Creating symbolic replicas of your pet’s features, much like full-body wool felt portraits.
- Decorative Sculptures: Displaying as standalone art pieces to showcase craftsmanship.
FAQ
Do I need special glue to attach wool to clay?
While wool can be felted directly onto porous clay surfaces, many artists prefer using a thin felt pad or applying fabric glue to create a secure base for felting.
Can I use synthetic fibers instead of wool?
Wool works best because its scales interlock when needle-felted. Synthetic fibers may not felt well, but they can be glued on for decorative effects.
How do I make the fur look more natural?
Blend multiple shades of wool, layer gradually, and always reference real cat photos. Subtle shading with pastels can also add realism.
Is this technique beginner-friendly?
Yes, though patience is required. Beginners can start with simple ear shapes and gradually learn blending techniques. Many find it similar to creating mini felted pet charms.
Conclusion
Combining polymer clay sculpting with wool needle felting opens up a world of creative possibilities. The clay provides durability and structure, while the wool adds softness and realism, making your cat ears look and feel authentic.
This hybrid approach is more than just crafting — it’s a way to merge different art forms to create lifelike keepsakes. Whether for cosplay, doll-making, or memorial purposes, these cat ears showcase the beauty of mixing mediums to celebrate our love for animals.
And for pet lovers seeking even more meaningful creations, exploring custom wool felt stuffed animals can be another beautiful step in preserving memories of beloved companions.
