Readable. Practical. Emotionally aware. This guide is written for people who love animals and want to do right by them on canvas—whether you’re opening your first tube of oil paint or you already paint and simply want a better process. We’ll work from intention to technique: how to plan, what to notice, how to layer, how to finish, and how to preserve. No fluff, no hype—just the things that make your next portrait kinder, truer, and more durable.
Table of Contents
- Why Oil for Pets (and When Not To)
- Materials That Save You Time (and Mistakes)
- Build a Great Reference (Before You Touch a Brush)
- Composition That Feels Like Your Pet
- Values & Light: 70% of Realism Happens Here
- Color Strategy: Neutrals, Temperature, and Livelier Blacks
- Edges: Where Softness Lives
- Fur: Short, Long, Curly, and Shiny Coats
- Eyes & Expression: Micro-Details that Carry the Portrait
- Nose, Ears, Whiskers, and Paws
- Underpainting → Body Color → Glazes (A Layering Roadmap)
- Fixes for Common Problems (With Gentle Checklists)
- Drying, Oiling Out, Varnish, and Framing
- Archival Care & Photographing Your Work
- Three Mini Case Studies
- If You’re Not Painting: Thoughtful Ways to Commission
- Further Exploration (Oil Painting Series & Modern Formats)
- FAQ (Foldable)
Why Oil for Pets (and When Not To)
Why oil? Two words: time and depth. Oils stay open longer, so you can blend fur transitions and soften edges without fighting your medium. Layers of transparent color (glazes) create depth in eyes and coats that’s hard to fake. Properly cured and varnished, oils last decades.
When not to: If you need a fast turnaround, prefer a matte look, or work in a ventilation-limited space, consider gouache or acrylic underlayers finished with oil only in final passages. You still get oil’s glow without long, fully-oil sessions.

Materials That Save You Time (and Mistakes)
Supports: Linen (portrait weave) for finest blending; cotton for budget; primed panels for crisp detail. Avoid flimsy canvases—they bounce under the brush and fatigue your wrist.
- Ground: Acrylic gesso or oil primer. A light, warm gray ground helps you judge values quickly (white grounds trick your eye).
- Brushes: Filberts (blending), rounds (details), flats (planes). Keep one large clean, dry brush for softening edges.
- Palette: Titanium White, Yellow Ochre, Raw Sienna, Burnt Sienna, Transparent Oxide Red, Ultramarine Blue, Phthalo Blue (sparingly), Alizarin Crimson (or Permanent Alizarin), Burnt Umber, Ivory Black (optional), and a convenience green (Viridian) for cool fur notes.
- Mediums: Refined linseed or walnut oil; a small amount of odorless mineral spirits (OMS) for initial thin underpainting. Follow “fat over lean.”
- Safety: Ventilation, metal waste can with water for rags (to prevent spontaneous combustion), gloves if desired.
Tip: Pre-mix a string of fur values (five steps from shadow to highlight). You’ll paint faster and make fewer muddy corrections.
Build a Great Reference (Before You Touch a Brush)
Light: Window light (side-lit) reveals form without harsh contrast. Avoid mixed color temperatures (e.g., warm lamp + cool window) unless you want that look and can manage color shifts.
Angles: Get eye level for dignity; slightly above for cuteness; slightly below for nobility. Avoid extreme wide-angle distortion on noses unless it’s a stylistic choice.
Expression: Wait for the quiet moment after a play burst—mouth relaxed, eyes bright, ears at their natural set. Bribe with treats; shoot in short bursts.
Editing: Pick one hero photo. You can borrow small details (ear interior color, paw pads) from others, but keep lighting direction consistent across references.
Composition That Feels Like Your Pet
Crop with purpose: Head-and-shoulders for intimacy; ¾ pose to include body language; full body for gait and personality. Leave “breathing room” in the gaze direction.
Backgrounds: Keep them simple. Suggest environment with color temperature (cool outdoor, warm indoor) and a few soft shapes. Don’t out-detail the subject.
Design: Use a value thumbnail (three tones max) to map big shapes. If the thumbnail reads, the painting will, too.
Values & Light: 70% of Realism Happens Here
Think in three big families: light, mid, shadow. Keep shadow shapes connected (don’t pepper with random lights). Place the single brightest highlight in the eyes or the moist plane of the nose—never everywhere.
Exercise: Convert your reference to grayscale and paint a 4×6 value study in 20 minutes. You’ll solve most form issues before color ever enters.
Color Strategy: Neutrals, Temperature, and Livelier Blacks
Neutrals carry realism. The eye reads small temperature shifts more than saturated color in fur. Warm-cool variations (Yellow Ochre vs. Ultramarine) will make dark coats read dimensional without chalky whites.
- Blacks: Mix Burnt Umber + Ultramarine for a living black. Tilt warm or cool by biasing one component. Save tube black for the deepest pupils or accents.
- Whites: White fur isn’t “white.” Start in grays, save pure Titanium White for a few specular notes on whiskers or glossy highlights.
- Reds/Tans: Build with Transparent Oxide Red + Yellow Ochre, knock back with a touch of blue to avoid cartoon warmth.

Edges: Where Softness Lives
Hard edges attract attention; soft edges suggest fur and depth. Lose edges into the background on the far cheek; keep harder edges at the near eye, nose bridge, and mouth corner. Use a clean, dry filbert to barely feather transitions—don’t smear; kiss the paint.
Fur: Short, Long, Curly, and Shiny Coats
Short coats (pugs, boxers): Work in planes first, tiny strokes last. Use more hard→soft edge control than individual hairs. A few directional strokes over solid value work beats thousands of random hairs.
Long coats (goldens, ragdolls): Mass big locks first. Pull lighter strands over mid-tones with a slightly oily mix. Reserve a handful of flyaway hairs at the very end to imply softness.
Curly coats (poodles): Paint “clumps” not curls—small value pillows with quick s-shaped highlights. Overdrawing spirals makes plastic noodles.
Shiny coats (black cats/dogs): Push temperature: cool reflections near windows, slightly warmer bounce light under the jaw. Keep highlights thin and placed.
Eyes & Expression: Micro-Details that Carry the Portrait
Iris: Transparent warm glaze over a darker base, with a cooler rim near the sclera. Keep the pupil clean and truly dark (your deepest dark).
Catchlights: One main light shape, placed consistently with your reference lighting. Two small lights only if you genuinely have two sources.
Eyelids & membranes: Suggest the moist lower lid with a warmer, semi-transparent stroke. It’s this transition, not giant catchlights, that gives life.
Nose, Ears, Whiskers, and Paws
Nose: Think faceted planes with soft specular highlights, not dots. Indicate pores with temperature spots, not literal polka-dots.
Ears: The inner ear is thin and translucent—glaze a warm note, then cross-veil with cooler shadow strings to suggest tiny hairs.
Whiskers: Load fluid paint, lay in one confident pull after the surrounding paint is touch-dry. Less is more; broken lines feel natural.
Paws: Describe gesture and weight. A single compressed shadow under pads implies pressure far better than hard outlines.
Underpainting → Body Color → Glazes (A Layering Roadmap)
1) Draw & value map: Wipe-out method on a toned ground or a thin Raw Umber block-in. Keep it simple and right.
2) Dead-color pass: Lay average body colors thinly, no details. You’re proving the big relationships work.
3) Form modeling: Build mid-tones to lights, restate shadows, and place accents. Edges now matter more than color.
4) Features: Eyes, nose, mouth. Work as a set so they agree in sharpness and value range.
5) Selective glazing/scumbling: Transparent warms in ears/iris; cool scumbles to soften muzzle planes. A tiny bit goes far.
6) Final notes: Flyaways, whiskers, and the single brightest specular. Stop before you narrate every hair.
Fixes for Common Problems (With Gentle Checklists)
Muddy color? Too many brush trips. Scrape back, re-mix a limited pile, repaint in two purposeful passes. Keep paints cleaner on the palette (wipe mixing area often).
Flat fur? You likely painted hairs before planes. Re-establish big shadow/mid/light masses; add only a few directional hairs on top.
Dead eyes? The iris value is too light overall. Deepen the pupil edge, cool the sclera shadows, restore a single crisp catchlight.
Chalky whites? Your lights are too cool or too thick too soon. Return to gray-violet families, reserve high-chroma whites for the end and keep them thin.
Plastic nose? Hard outlines. Replace with soft plane breaks and temperature shifts; sharpen only at the nostril rim nearest the light.
Drying, Oiling Out, Varnish, and Framing
Drying: Let the work reach touch-dry between stages. If some areas sink (look matte/patchy), oil out with a very thin oil layer, wipe nearly all off, and continue once tack-free.
Varnish: After a full cure (often weeks to months, size- and climate-dependent), apply a removable final varnish for even gloss and protection. If you need protection sooner, use a retouch varnish lightly.
Framing: Float frames flatter long-haired edges nicely; simple wood mouldings suit classic portraits. Avoid heavy visual competition with the subject.
Archival Care & Photographing Your Work
Placement: Avoid direct sun and high humidity swings (bathrooms, kitchens). Dust with a soft, dry brush. Don’t use cleaners on the paint film.
Documentation: Photograph outdoors in open shade or indoors with two diffused lights at 45°. Polarizing filters reduce glare. Straighten perspective in post, avoid over-saturation. Save a RAW file and a web-sized JPEG.
Three Mini Case Studies
Case A — Black Lab, glossy coat: Mixed black from Burnt Umber + Ultramarine, warmed planes facing floor light, cooled planes facing window. Kept highest shine on the near brow ridge and nose bridge. Lost the far cheek edge into background for depth.
Case B — Ginger tabby, long fur: Began with massed ribbons of value; added only a few sharp stripes where form turned. Balanced warm/orange body with cooler grays in shadow stripes to avoid cartoon orange.
Case C — Senior dog, soulful eyes: Expanded mid-tone range and reduced contrast in fur to imply age; concentrated highest contrast in the eyes (crisper lid edge, darker pupil) to pull viewers where the emotion lives.

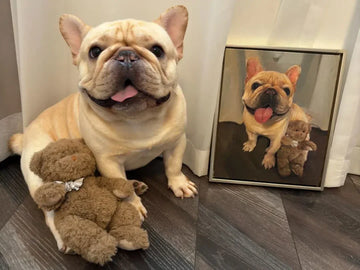
If You’re Not Painting: Thoughtful Ways to Commission
If you’d rather not paint, commissioning is a valid and meaningful path. Share the story you want told (quirks, routines, a favorite angle), not just a photo. Agree on lighting mood and background simplicity up front. Ask for a small value/color study if you’re unsure—tiny studies save large-scale disappointment.
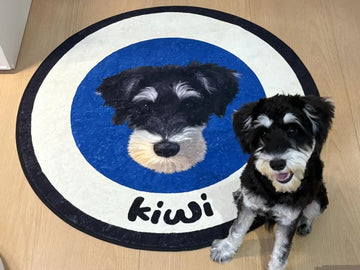
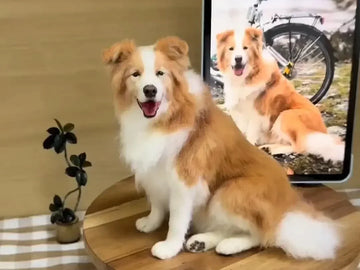
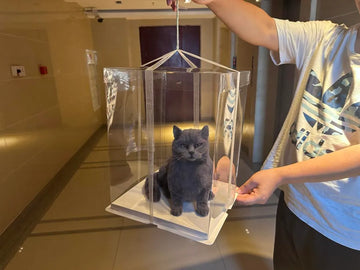
Further Exploration (Oil Painting Series & Modern Formats)
To study contemporary formats that blend tradition with daily life, explore these references thoughtfully (no pressure, only if they help your project thinking):
- Oil Painting Series (overview)
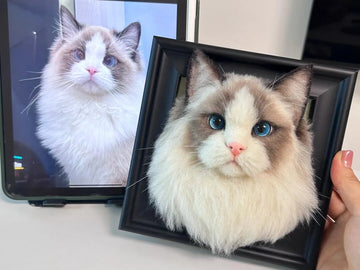
- 3D Oil Painted Pet Portrait on Glass — layering and light play.
- Custom Pet Photo Frame Painting on Glass — simple, elegant display.
- Custom Pet Portrait Oil Painting Phone Case — a portable tribute.
FAQ (Foldable)
What canvas size is best for a head-and-shoulders pet portrait?
8×10″ and 11×14″ are forgiving for beginners—large enough for convincing eyes without overwhelming brush control. For full body or two pets, consider 16×20″ or larger.
How do I avoid over-detailing fur?
Finish a small value study first. In color, paint planes before hairs; then set a timer for final hair accents (e.g., 12 minutes). When the timer rings, step back. Restraint reads more lifelike than uniform hair rendering.
My whites look chalky. Fix?
Glaze a whisper of warm transparent color into light planes (very thin). Rebuild highlights selectively with cleaner, thinner Titanium White. Ensure surrounding mid-tones are properly saturated; over-cooling the whole head causes chalk.
How long should I wait before final varnish?
Depends on paint thickness, medium, and climate. Many portrait painters wait several weeks to a few months. If you need to show the work earlier, use a light retouch varnish and inform the collector about a later full varnish.
Can I combine multiple pets from different photos?
Yes—keep light direction and camera height consistent. Sketch composite thumbnails first to solve scale and gaze interactions before committing to paint.
Practical Exercises to Build Confidence
Reading about oil painting is one thing—sitting down to try it is another. Below are a few structured exercises you can use to build skill without pressure. Think of them as warm-ups rather than full paintings.
- Value block-in drills: Choose one pet photo, convert it to grayscale, and paint only three values (light, mid, dark). Set a timer for 30 minutes.
- Edge softening practice: Paint a simple sphere on toned ground. Then soften one edge into the background using only a clean dry brush. Observe how the form turns.
- Fur strokes study: On a small scrap panel, practice short directional strokes, then long sweeping ones, then overlapping s-shaped ones. Vary brush pressure.
- Eye micro-study: Isolate just one eye from a photo, paint at double scale (4×4″). Focus on iris transparency and a crisp catchlight.
One-Page Pre-Paint Checklist
Before beginning a full pet portrait, run through this checklist. It will save hours later.
- ✔️ Is my reference photo well-lit and clear? One hero image chosen?
- ✔️ Do I have a value thumbnail sketch (3–4 tones) that reads?
- ✔️ Have I pre-mixed a fur color string (shadow→light)?
- ✔️ Is my canvas properly toned (warm gray, mid-value)?
- ✔️ Brushes clean, mediums fresh, rags stored in metal can?
- ✔️ Do I know where my focal point is (usually the eyes)?
Suggested Timeline for a First Full Portrait
This is not rigid—it’s a guideline to help structure your sessions. Stretch or compress based on your pace.
- Day 1: Sketch & wipe-out underdrawing (30–60 minutes). Let dry.
- Day 2: Dead-color pass (lay in flat local colors). Stop early, step back.
- Day 3–4: Form modeling: build values, establish fur direction, refine anatomy.
- Day 5: Eyes, nose, and key features painted in one sitting.
- Day 6: Rest. Return to soften edges and add selective highlights.
- Day 7: Add whiskers, flyaway hairs, final varnish notes if needed (retouch varnish optional).
Extra Resources
If you’d like to see how contemporary oil techniques adapt into products or other artistic outputs, here are some gentle entry points:
- Oil Painting Series Collection — browse multiple formats for inspiration.
- 3D Oil Painted Pet Portrait on Glass — shows how transparency and oil can merge.
- Photo Frame Painting on Glass — demonstrates composition in practical display.
- Oil Painting Phone Case — a portable reinterpretation of the oil tradition.
Closing Thoughts
Painting pets in oil is both a technical and emotional journey. The goal isn’t to narrate every hair, but to hold onto essence—the tilt of an ear, the light in the eyes, the shape of rest. Whether you paint one portrait a year or one every week, each session teaches new patience and observation. Remember: dogs and cats chose us for their short time here. Painting them slowly, in layers, with care, is a way of choosing them back.