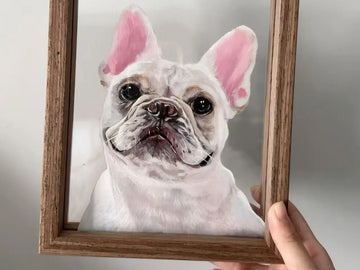
Oil paintings capture the soulful expressions of dogs—subtle ear tilts, shifting pupils, and the warmth of their gaze—in ways photographs often miss. By leveraging color psychology, artists can enhance emotional depth, such as using golden hues to evoke loyalty.
If you're wondering how to paint a dog in oil, this guide covers everything from materials to advanced techniques for lifelike fur, expressive eyes, and even intricate details like nails.

What Is a Painted Dog?
An oil painting of a dog is a hand-painted artwork featuring dogs as the primary subject. These portraits, rendered on canvas with oil paints, showcase breed characteristics, personality, and emotional connections with humans. Ideal for homes, pet clinics, or as custom memorial gifts, they preserve cherished memories. Some works by renowned artists even hold significant collectible value.
Step-by-Step: How to Paint a Dog in Oil?
Materials Needed for Paintings of a Dog
To create a beautiful, long-lasting oil painting of your dog, you'll need professional-grade materials that ensure rich colors, proper texture, and durability. Here's what every pet portrait artist should have:
l Canvas or board
l Backing material
l Oil paints
l Color media & solvents
l Painting brush
l Auxiliary means, such as color palette or easel, palette knife
Then, we'll master the key elements of a lifelike dog portrait: the expressive face and detailed paws.
How to Paint a Dog Face?
Before painting a full dog portrait, mastering the facial structure is essential. Creating a realistic dog face requires understanding anatomy, fur texture, and expressive details. Follow this professional approach to painting a dog face:
1. Select Your Reference Photo
Select a clear front or side photo with strong side lighting to best capture the dog's facial volume and dimension.
2. Map Key Facial Structures
Identify and mark the key facial structures including the nose bridge, eye placement, ear base, and mouth line, noting important breed variations between dogs like Golden Retrievers and German Shepherds.
3. Create Initial Sketch
Create a light preliminary sketch using either fine charcoal or diluted brown paint mixed with turpentine, keeping strokes faint for easy adjustments.
4. Establish Base Tones
Apply your base layers with a large hog bristle brush using paint thinned with pine oil, establishing the fundamental light and shadow patterns.
5. Render Key Features
Nose:
l Start with a dark base (ivory black + ochre)
l Preserve highlight area for moist appearance
Eyes:
l Position above head's midline
l Puppies have proportionally larger eyes
l Begin with dark eye sockets
l Add precise pupil dots
6. Develop Fur Texture
Develop realistic fur texture through carefully layered brushwork, building up hair details gradually from dark undercoats to lighter top layers.
How to Paint a Dog’s Nails (Paws) for Realism?
Can you paint a dog's nails? Doing so well can significantly enhance the realism of your pet portrait. Here’s how to capture their texture and form with precision:
1. Base Layer & Positioning
Lightly sketch the nails using diluted dark brown, noting that the front paws have thicker, shorter nails than the rear.
2. Building Volume
Shadows: Use dark gray (ivory black + titanium white) or warm brown (ochre + ultramarine) to define the nail base and root depression.
Highlights: For light nails, mix titanium white with a touch of yellow ochre; for dark nails, use cool gray.
3. Detailing for Realism
Light-Colored Nails:
l Apply a translucent wash of burnt umber to the nail center, reserving the tip for highlights.
l Once dry, use a fine brush to add subtle pinkish tones (titanium white + a hint of red) for a natural keratin effect.
Dark Nails:
l Start with a base of raw umber + black, then scrape off tiny streaks with a palette knife to mimic wear.
Final Highlights:
Dot titanium white (+ cobalt blue for cool tones) on the nail’s curve, ensuring highlights align with your light source (e.g., upper right).
Ø Example: Golden Retriever Front Paw
1. Outline the paw pad and nails with burnt umber.
2. Block in nails (titanium white + raw umber), darkening the roots.
3. Glaze with orange ochre for translucency.
4. Add highlights (titanium white + lemon yellow) and scrape faint vertical marks for texture.

Alternative: Commission a Custom Dog Portrait
Let PetDecorArt transform your beloved dog into a stunning oil painting masterpiece—no painting skills required! Here’s why pet lovers worldwide trust them:
Why Choose PetDecorArt?
"Pet Portrait Immortality" Service
l Whimsical Renaissance-style portraits with regal costumes
l Playful anthropomorphic twists that capture your pet’s personality
Memorial Tributes
l Add symbolic touches like angel wings or Rainbow Bridge motifs
l Heartfelt compositions to honor departed companions
Custom Owner-Pet Scenes
l Cherished moments immortalized (cuddles, playtime, or adventures)
l Tailored to your vision, from classic to contemporary styles
The Petdecorart Difference
l Traditional Artistry Meets Modern Innovation
l Hand-painted by master artists (no mass-produced prints!)
l Professional techniques ensure quick turnarounds without sacrificing quality
Why It Works:
PetDecorArt bridges the gap between:
l Emotional value (unique, handcrafted tributes)
l Practicality (faster production than traditional studios)
Final Thoughts
Mastering how to paint a dog in oil takes practice, but the emotional payoff is immense. Whether you DIY or commission an artist, a well-executed portrait immortalizes your pet’s spirit. For high-quality custom pet portraits, explore Petdecorart’s oil painting services today!


