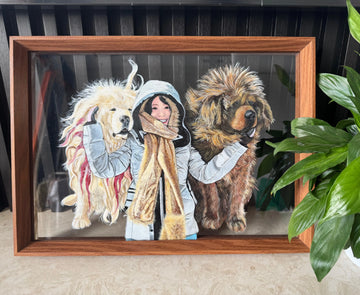
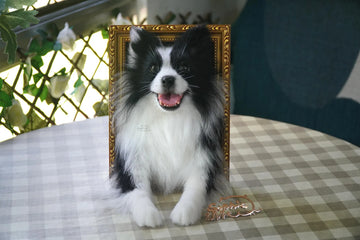
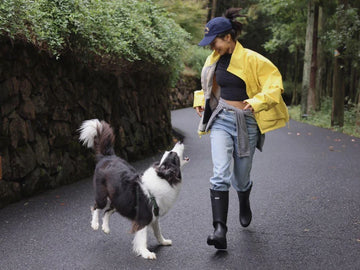
Do you miss your pet when you're apart? Why not keep them close with custom embroidered pet portraits on shirts, hats, and accessories? Just turn any photo into a wearable keepsake that brings your furry friend along everywhere—to work, dinner, or your commute. Here is a complete guide on how to turn a photo of your pet into embroidered pet portraits.
Step-by-Step on Turning a Photo of Your Pet into Embroidered Pet Portraits
Many pet lovers have tried embroidering their pets onto clothing and accessories—such as pet embroidered T shirt, custom embroidered pet shirt, custom embroidered pet hat, and shoes—using tutorials found online. If you want to create a professional-looking embroidered pet portrait, follow these expert tips.
Step 1: Choosing the Right Pet Photo
The photo you select is crucial—it determines how realistic and accurate the final embroidery will be. Keep these factors in mind when picking your image:
l Is the photo clear? A high-resolution image ensures fine details (like fur texture) are visible.
l Is the lighting balanced? Overly bright or dark photos can distort color selection.
l Has the photo been edited? Avoid filters or color adjustments, as they may alter your pet’s natural tones, which are essential for a lifelike result.
l Is the composition ideal? A well-framed shot (e.g., two-thirds of the upper body) works best for embroidery sizing and detail.
Step 2: Choosing the Right Materials & Essential Tools
Then, you should choose the right tools and materials, which will set you up for success. Essential equipment includes:
l an embroidery hoop (7-9 inches is ideal for beginners)
l sharp embroidery needles in sizes 7-9
l a water-soluble fabric marker for temporary guidelines
l small, sharp scissors for precise thread cutting.
For materials, opt for high-quality DMC 6-strand embroidery floss known for its colorfast durability. If you’re looking for stable fabric, you can choose materials like cotton or linen. Don't forget to use stabilizer to prevent puckering while you work.
Step 3: Practical Embroidery Techniques
The long-and-short stitch creates beautiful fur texture, while the split stitch is perfect for outlining distinctive features. French knots add wonderful dimension for nose texture and whisker dots, and the satin stitch produces smooth, polished areas like eyes. A professional tip is to work from the background to the foreground, progressing from darker to lighter thread colors for natural-looking depth.
Step 4: Mastering the Art of Fur and Shade
The secret to realistic fur lies in building up colors softly, just like nature does. Start by working with just a few strands of floss at a time - this delicate approach lets you create those whisper-soft shadows and highlights that make fur look touchable.
Begin with the darkest shades and gradually layer lighter colors to build dimension. Varying your stitch directions mimics the natural flow of fur, and leaving small gaps between color sections creates soft, believable transitions. This attention to detail will make your embroidered pet look wonderfully lifelike.
Step 5: Finishing Touches
Adding thoughtful finishing touches elevates your work. Delicate single straight stitches create perfect whiskers, while crisp backstitching defines the eyes beautifully. Scatter French knots throughout the fur areas to create depth and texture. Remember to frequently step back from your work to check proportions and make adjustments - this perspective helps ensure your final piece accurately captures your pet's likeness.
Step 6: Finalizing Your Work
Finalizing your embroidered portrait requires careful attention. Remove any remaining visible transfer marks according to your chosen method's instructions. Gently wash the piece to eliminate stabilizer residue, then press it from the back using low heat to preserve the stitches. Your completed masterpiece can now be framed as keepsake art or attached to your chosen clothing item as wearable tribute to your pet.

This complete guide takes you through every stage of creating a cherished embroidered pet portrait, from selecting the perfect photo to properly caring for your finished work. Each step builds upon the last to help you create a professional-quality piece that beautifully honors your beloved companion.
Types of Embroidered Pet Portraits on Apparel at PetDecorArt You Can Choose
Your beloved pet deserves to be with you year-round—not just on special occasions. That’s why we offer hand-embroidered pet portraits on a variety of apparel, ensuring you can celebrate your furry friend wherever you go.
Wearable Tributes for Every Occasion
l Formal Elegance: Subtle chest-pocket embroidery on blazers or dress shirts adds a personal touch to professional attire.
l Summer Staples: Lightweight T-shirts and shirts featuring your pet portrait—perfect for casual outings or beach days with friends.
l Winter Essentials: Cozy beanies and knit hats adorned with your pet’s face, keeping you warm while showing off their likeness.
Why Choose PetDecorArt for Hand Embroidered Pet Portraits?
Our artisans spend hours perfecting each pet portrait, using only the finest fade-resistant threads and ultra-soft fabrics to ensure your pet’s likeness stays vibrant wash after wash. Whether you’re snuggled up in a cozy beanie, sporting a timeless T-shirt, or topping off your look with a classic cap, your loyal companion stays by your side—always. Explore our collection of custom pet apparel>>

Conclusion
While the embroidery techniques we've shared are simple to follow, we understand not everyone has the time or desire to create these portraits themselves.For those who prefer a professionally crafted keepsake, we invite you to visit our website to explore our exquisite wool felt pet portraits.
Discover the perfect way to honor your furry friend with embroidered pet portraits today at https://petdecorart.com/.


