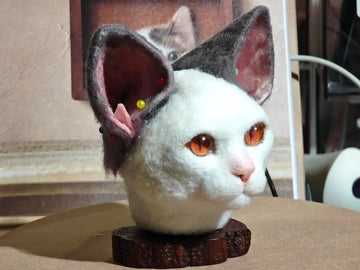
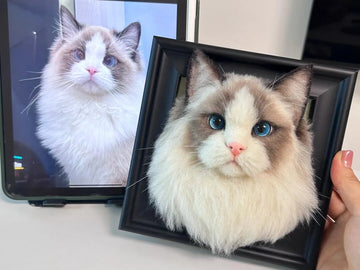
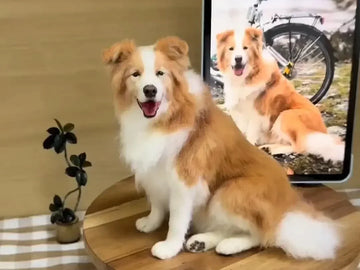
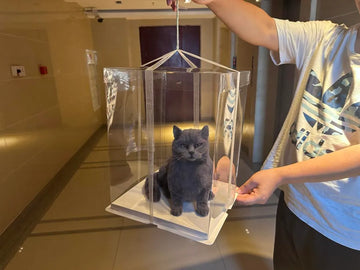
A step-by-step guide to sculpting lifelike pet noses using wool felting and wax/polymer clay bases.
Introduction
When creating wool felt pet replicas, one of the most challenging yet rewarding details is the nose. The nose defines character, personality, and realism. Unlike general body felting, the nose requires precision and often the use of mixed materials like wax or polymer clay combined with wool.
In this guide, we’ll go through each stage of making a lifelike pet nose: from sculpting the tip, blending with the bridge, shaping nostrils, to finishing the center seam. These methods are used by many artists behind high-quality custom stuffed animal clones that PetDecorArt offers.
Materials Needed
- Wax or Polymer Clay: For sculpting the nose base.
- Felting Wool: Black, pink, brown, and gray shades for blending.
- Felting Needles: Medium and fine for layering and detailing.
- Curved Scissors: For trimming wool fibers around the nose.
- Soft Pastels or Pigments: To enhance the seam line and subtle shading.
- Reference Photos: Close-ups of your pet’s nose to capture unique features.
Step 1: Sculpting the Nose Tip
The nose tip is the focal point. There are two main approaches:
- Wax/Clay Base: Create a durable, slightly glossy surface. This is ideal for achieving realistic pores and shine.
- Wool + Wax Method: My preferred technique. Felt the basic nose shape with wool, then seal and refine it with thin wax layers. This combines flexibility with a natural finish.
The key is balance: the nose should be firm enough to hold shape but still harmonize with the softness of wool felting around it.

Step 2: Connecting Nose Tip and Bridge
The transition from the nose tip to the bridge is where realism truly comes alive. In real pets, this area shows a soft gradient of pinkish tones with sparse hair coverage.
To replicate this:
- Use small amounts of pink wool fibers, applied in scattered layers.
- Secure fibers with fine felting needles, allowing slight irregularity for a natural look.
- Trim with curved scissors to match the subtle flow of fur toward the face.
This careful blending mimics how fur thins out near the nose, giving a seamless integration with the clay or wax base.

Step 3: Shaping the Nostrils
Nostrils are tricky because they require depth without looking overdone. I recommend using a blend of pink and brown wool:
- Roll tiny tufts of blended fibers.
- Insert gradually into the nostril cavities, felting inward while keeping edges clean.
- Regularly remove loose fibers — stray fuzz can ruin sharp detail.
Adding darker tones toward the inside and lighter pink outside enhances depth and realism. Similar methods are also used when crafting details on wool felt pet portrait brooches.

Step 4: Adding the Center Seam
The nose seam is often overlooked but crucial. Never carve it into hardened wax or clay — this causes cracks and breaks the illusion.
Instead:
- Define the seam gently before the wax is fully set.
- Reinforce subtle depth with soft pastel pigments or diluted paint.
- Darken gradually — harsh lines look unnatural.
With this method, the seam appears organic, like a natural skin fold rather than an artificial scratch.

Additional Tips for Realism
- Always reference close-up pet photos — no two noses are alike.
- Experiment with wax thickness. Too much wax makes the nose stiff; too little loses shine.
- Use a mix of wool textures. Blending coarse and fine fibers adds depth.
- Finish with tiny fiber trimming for subtle fur flow around the nose edges.
FAQ
Can I make a pet nose entirely from wool?
Yes, but wax or clay bases add durability and allow for more lifelike textures. Pure wool noses can look soft but may lack realistic shine.
What’s the advantage of using wax over polymer clay?
Wax blends more naturally with wool and allows for subtle reshaping. Clay provides stability but requires careful integration with fibers.
How do I prevent cracks in the seam?
Never carve the seam into hardened surfaces. Instead, shape before setting and enhance with pigment afterward.
Is this technique beginner-friendly?
Yes, but it requires patience. Beginners may start with wool-only noses, then gradually introduce wax or clay bases for advanced realism.
Conclusion
Crafting a realistic wool felt pet nose is both technical and artistic. From sculpting the tip with wax or wool, blending the bridge with subtle fibers, shaping nostrils, to finishing the seam, each step adds depth and character.
By combining these methods, you can achieve stunningly lifelike noses that elevate your entire felted pet project. If you’re inspired by these techniques, explore PetDecorArt’s custom wool felt stuffed animals, where similar craftsmanship brings pets to life in unique keepsakes.
