
Last updated:
Making a cat sculpture is less about adding hundreds of tiny fur lines and more about getting four things right: the silhouette, head shape, facial landmarks, and the pose that gives the cat its personality. This guide walks you through a manageable 5- to 7-inch seated cat using air-dry or polymer clay, then shows how to adapt the same process when you want the sculpture to resemble a real cat.
Quick Answer
To make a cat sculpture, begin with a simple seated pose, create a lightweight foil core, cover it with clay, and build the figure from large shapes to small details. Form the body and head first, then add the legs, paws, ears, tail, muzzle, eyes, and coat markings. Let air-dry clay dry completely or cure polymer clay according to its package instructions. Finish by sanding rough areas, painting thin layers of acrylic color, and applying a compatible sealer.
For a first project, choose a compact seated pose instead of a standing cat. Four feet, thin ankles, and a raised tail make a standing figure much harder to balance and far more likely to crack or break.

1. Choose the Right Cat Sculpture Material
“Clay cat sculpture” can refer to several different materials. They may look similar while you are shaping them, but their drying process, durability, and required equipment are different.
| Material | Best For | Main Advantages | Limitations | Curing or Drying | Guidance Source |
|---|---|---|---|---|---|
| Air-dry clay | First projects, larger decorative cats, no-oven households | Easy to find, simple cleanup, can be sanded and painted | Can crack while drying and remains vulnerable to moisture | Varies by brand and thickness. Crayola states approximately 24 hours to feel dry and 72 hours to dry completely for its product. | Crayola air-dry guidance |
| Polymer clay | Small figures, fine facial details, smooth or stylized cats | Does not dry while you work and can hold small details well | Must be oven-cured correctly; thick solid pieces waste clay | Follow the exact package directions. Different polymer-clay formulas can require different temperatures and curing times. | Sculpey baking guide |
| Ceramic clay | Pottery studios, long-lasting fired sculpture, glazed finishes | Professional ceramic result after proper firing | Requires compatible clay, glaze, kiln access, and firing knowledge | The piece must become fully bone-dry before kiln firing. Many ceramic projects are fired once for bisque and again after glazing. | AMACO beginner clay guide |
| Needle-felted wool | Realistic fur, soft full-body replicas, memorial sculptures | Excellent control over coat color and fur direction | Requires felting needles, patience, and careful handling | No oven or kiln; fibers are compacted repeatedly with barbed needles | How to needle felt a realistic cat |
2. Tools and Supplies
You do not need a professional sculpture studio. A basic set of household and craft tools is enough for a first cat.
| Supply | Purpose | Beginner Substitute | Buying Note |
|---|---|---|---|
| Air-dry or polymer clay | Creates the visible sculpture surface | None | Start with approximately 8–16 ounces for a hollow 5–7 inch figure |
| Aluminum foil | Builds a lightweight body and head core | None | Compress it firmly so the sculpture does not feel spongy |
| Aluminum craft wire | Supports the tail or unusually thin parts | Skip it for a compact tail resting against the body | Use wire compatible with your clay and curing method |
| Sculpting tools | Shapes eye sockets, mouth lines, paws, and fur | Toothpick, spoon handle, knitting needle, old paintbrush | A ball stylus and silicone shaper are the most useful starter tools |
| Craft knife | Cuts clay and trims cured edges | Plastic clay blade | Adult supervision is required |
| Small paintbrushes | Smoothing, painting, and adding markings | Clean makeup brushes | Keep separate brushes for dry blending and wet paint |
| Acrylic paint | Creates coat color, nose, eyes, and shadows | Artist or craft acrylic | Thin layers preserve sculpted texture better than one heavy coat |
| Fine sandpaper | Removes small bumps after drying | Fine sanding sponge | Wear suitable protection and clean dust carefully |
| Compatible sealer | Protects paint and reduces surface wear | Water-based acrylic varnish | Test on scrap clay before coating the finished cat |
3. Prepare Reference Photos Before You Touch the Clay
A recognizable cat sculpture usually begins with better reference photos, not better tools. One attractive portrait may show the face clearly but hide the tail, chest shape, back curve, and leg proportions.
Reference Photo Checklist
- Front view: taken near the cat’s eye level.
- Side profile: shows the forehead, nose, chest, back, and tail.
- Three-quarter view: helps explain the depth of the muzzle and cheeks.
- Full-body pose: shows how the paws, legs, and tail sit together.
- Coat-marking photos: include the back, chest, paws, and tail rings.
- Eye and nose close-up: useful for color and shape.
- Daylight color reference: reduces yellow indoor lighting distortion.
Print or display your main reference at roughly the same size as the planned sculpture. It becomes much easier to compare ear angle, head width, and body length when the reference is not a tiny image in the corner of a phone.
4. A Simple Proportion Plan for a Seated Cat
The measurements below are starting points for a 6-inch stylized or semi-realistic seated sculpture. They are not strict anatomical rules. Long, short, flat-faced, slender, and heavily coated cats will need adjustments based on the reference photos.
| Part | Suggested Starting Size | What to Check Against the Photo |
|---|---|---|
| Total height | Approximately 6 inches | Top of ears to bottom of front paws |
| Head | About one-quarter to one-third of total height | Round, wedge-shaped, broad-cheeked, or narrow |
| Body | Pear or egg shape, wider near the seated base | Chest fluff, waist, belly, and shoulder width |
| Front legs | Two short tapered columns | Distance between paws and amount of visible leg |
| Back legs | Broad folded masses on both sides of the body | Do not model them as four identical straight legs |
| Eyes | Begin near one eye-width apart | Actual spacing, tilt, size, and eyelid shape |
| Ears | Triangles with thickness and a slightly curved outer edge | Height, width, outward angle, folds, and ear-tip shape |
| Muzzle | Two rounded pads below the nose | Short or projecting muzzle, chin depth, whisker-pad fullness |
| Tail | Tapered form resting against the body or base | Length, thickness, bend, rings, and fluffy appearance |
5. How to Make a Cat Sculpture Step by Step
-
Choose One Clear Pose
Start with a seated cat looking forward or turned slightly to one side. Decide where the tail will rest before building anything. A tail wrapped around the front paws or pressed along the body gives the sculpture another support point and is easier than a tail suspended in the air.
Make a quick front and side sketch. Mark the top of the ears, bottom of the paws, widest part of the chest, eye line, and tail position.
-
Build a Lightweight Foil Core
Compress aluminum foil into a firm pear shape for the torso. Make a separate smaller ball for the head. The foil should be dense enough to resist pressure but slightly smaller than the final sculpture because clay will add volume.
Press the torso firmly onto the work surface to create a flat, stable base. Balance matters more than perfectly smooth foil.
-
Join the Head and Body
Position the head where the neck would naturally emerge from the shoulders. A cat’s head should not look like a ball balanced on top of a narrow stick. Blend the neck into the upper chest and shoulder area.
For polymer clay, use a compatible armature and joining method recommended for the clay. For air-dry clay, roughen both joining surfaces, add a small amount of water or slip if permitted by the manufacturer, press together, and blend the seam.
-
Cover the Core with an Even Clay Skin
Condition the clay until it is workable. Press relatively thin sheets over the foil instead of adding one thick solid mass. Blend the seams with your fingers or a silicone tool.
Keep the first surface simple. The goal is a clean body volume, not finished fur.
-
Shape the Chest, Back, and Seated Base
Refine the torso into the correct body type. A slender short-haired cat may have a visible waist and shoulder transition. A Persian, Maine Coon, or long-haired cat may need a fuller chest, broader cheeks, and softer body edges.
Check the side view. Many beginner sculptures look acceptable from the front but become too flat when viewed from the side.
-
Add the Front Legs and Paws
Roll two short tapered pieces for the front legs. Attach them beneath the chest and blend the upper ends into the shoulders. Add slightly wider paw shapes at the bottom.
Mark toe divisions with shallow lines. Deep cuts can split during drying and usually look less natural after painting.
-
Build the Folded Back Legs
A seated cat’s rear legs usually appear as larger rounded masses beside the body rather than two straight vertical legs. Add clay to both lower sides, then blend the forms into the belly and seated base.
View the sculpture from above. The hips should give the base enough width to remain stable.
-
Add the Tail
Roll a tapered coil and bend it gradually. Avoid a sharp bend, which can create a weak point. Attach as much of the tail as possible to the body or base while keeping the intended pose.
For a fluffy tail, enlarge the overall mass first. Fur texture cannot make a thin tail look naturally full.
-
Shape the Head Before Adding Features
Flatten the front of the head slightly, define the cheeks, and establish the forehead-to-muzzle slope. Do not begin with two deep eye holes in a perfectly round ball.
Compare the head from front, side, and three-quarter angles. Correct the skull shape now because paint cannot fix an incorrect profile.
-
Add the Ears
Make two small clay triangles with visible thickness. Press a shallow hollow into each inner ear and soften the outer edges. Attach the ears securely and blend the bases into the head.
Match the reference instead of placing both ears perfectly upright. One ear may rotate outward, sit lower, or have a rounded or clipped tip.
-
Place the Eyes, Nose, Muzzle, and Chin
Mark a light centerline down the face and a horizontal eye line. Place both eyes before refining either one. This makes it easier to compare height, spacing, and tilt.
Add the nose beneath the eyes, build two soft whisker pads, and place a small chin below the mouth. The mouth line should remain subtle. An exaggerated smile usually makes the cat look cartoonish unless that is your intended style.
-
Create Fur Without Covering the Form
Decide whether the sculpture will be smooth, lightly textured, or realistically furred. For short hair, use shallow directional marks only in selected areas. For long hair, add larger overlapping locks around the cheeks, chest, belly, and tail.
Follow actual hair direction: away from the nose, down the cheeks, outward over the chest, and along the body. Random scratches make the surface noisy without making it more realistic.
-
Inspect the Sculpture Before Curing
Put the sculpture down and step several feet away. Check it from the front, both sides, back, above, and near floor level. Look for uneven ears, a tilted head, floating paws, a weak tail connection, or a base that rocks.
Photograph the unpainted sculpture. A phone photo often makes proportion problems easier to notice than staring at the piece from the same working angle.
6. How to Make the Sculpture Look Like Your Cat
A realistic likeness does not require copying every strand of fur. Focus on the few features that make someone recognize the cat immediately.
Use the Four-Pass Likeness Method
| Pass | What You Match | Questions to Ask |
|---|---|---|
| 1. Silhouette | Body type, head size, ears, tail, sitting posture | Would the outline be recognizable without color? |
| 2. Landmarks | Eye spacing, nose position, cheek width, muzzle, chin | Are the features in the right places before they are detailed? |
| 3. Markings | Blazes, masks, stripes, socks, chest patches, tail rings | Are the important markings the right shape and on the correct side? |
| 4. Personality | Head tilt, ear angle, eyelid shape, paw position, tail carriage | Does the pose feel alert, relaxed, shy, serious, or mischievous? |
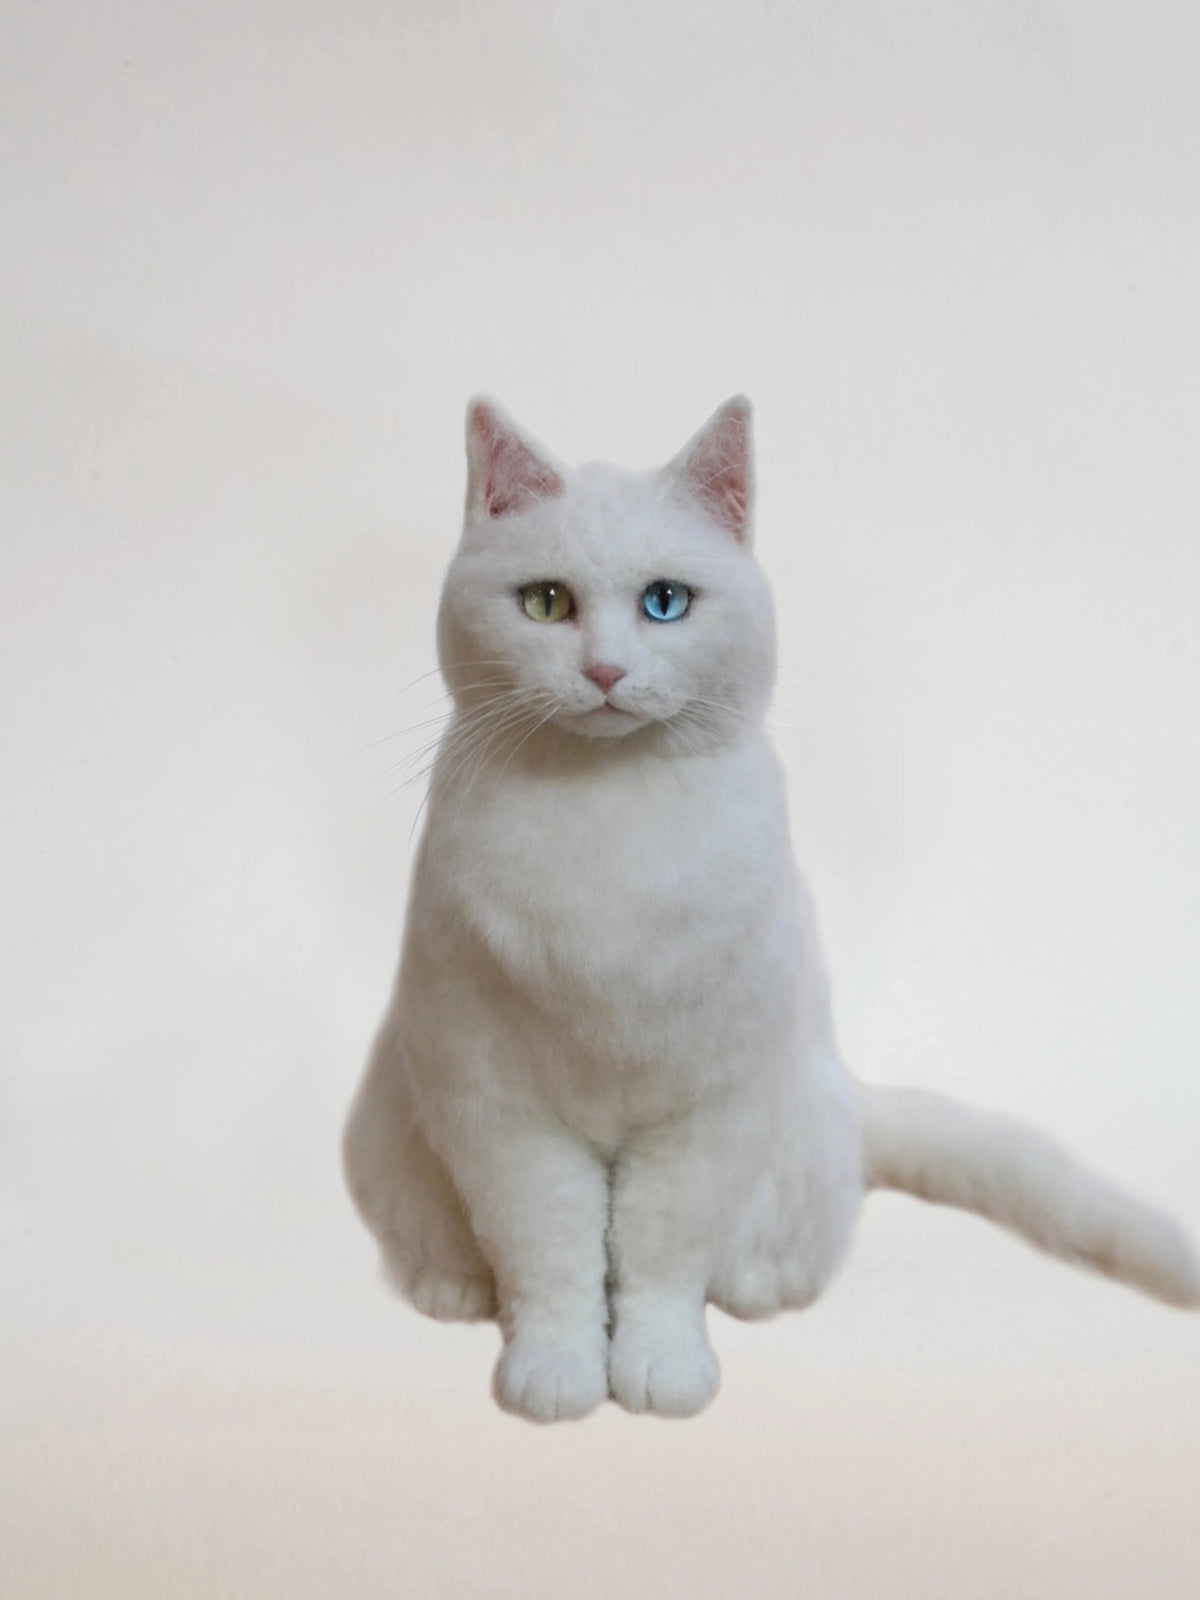
Prioritize Distinctive Features
- A bent or clipped ear
- One eye a different color from the other
- A dark patch crossing one eye
- White socks of different heights
- A short, curled, kinked, or unusually fluffy tail
- Prominent cheek fluff or a chest ruff
- A broad nose, tiny chin, or especially round eyes
7. Prefer a Professional Custom Cat Sculpture?
A home project is rewarding, but a realistic full-body replica can require extensive sculpting, color matching, and finishing experience. PetDecorArt offers several custom options made from pet photos, ranging from a freestanding wool-felt sculpture to a framed relief-style portrait and a clay portrait mug.
3D Custom Full-Body Pet Portrait
This handmade wool-felt sculpture is created from your pet photos and is designed to capture the complete pose, fur pattern, ears, paws, and tail.
- Current starting price: $499.99
- Listed size range: 6–8 inches through 14–16 inches
- Body material: Wool
- Eyes: Glass
- Detail materials: Resin, clay, or wax depending on the part
- Listed production period: Approximately 15–30 days
- Customization: Photo-based design and one-to-one revisions

3D Custom Cat Portrait with Wooden Frame
This option combines sculpture and wall art. Choose a head-only or half-body portrait when you want dimensional detail without needing space for a freestanding figure.
- Current starting price: $249.99
- Portrait options: Head only or half-body
- Listed frame sizes: 6, 7, 8, 10, 12, and 16 inches
- Main material: Handmade wool felt
- Eyes: Glass
- Listed production period: Approximately 15–30 days
- Display advantage: Easier to protect from dust and curious pets
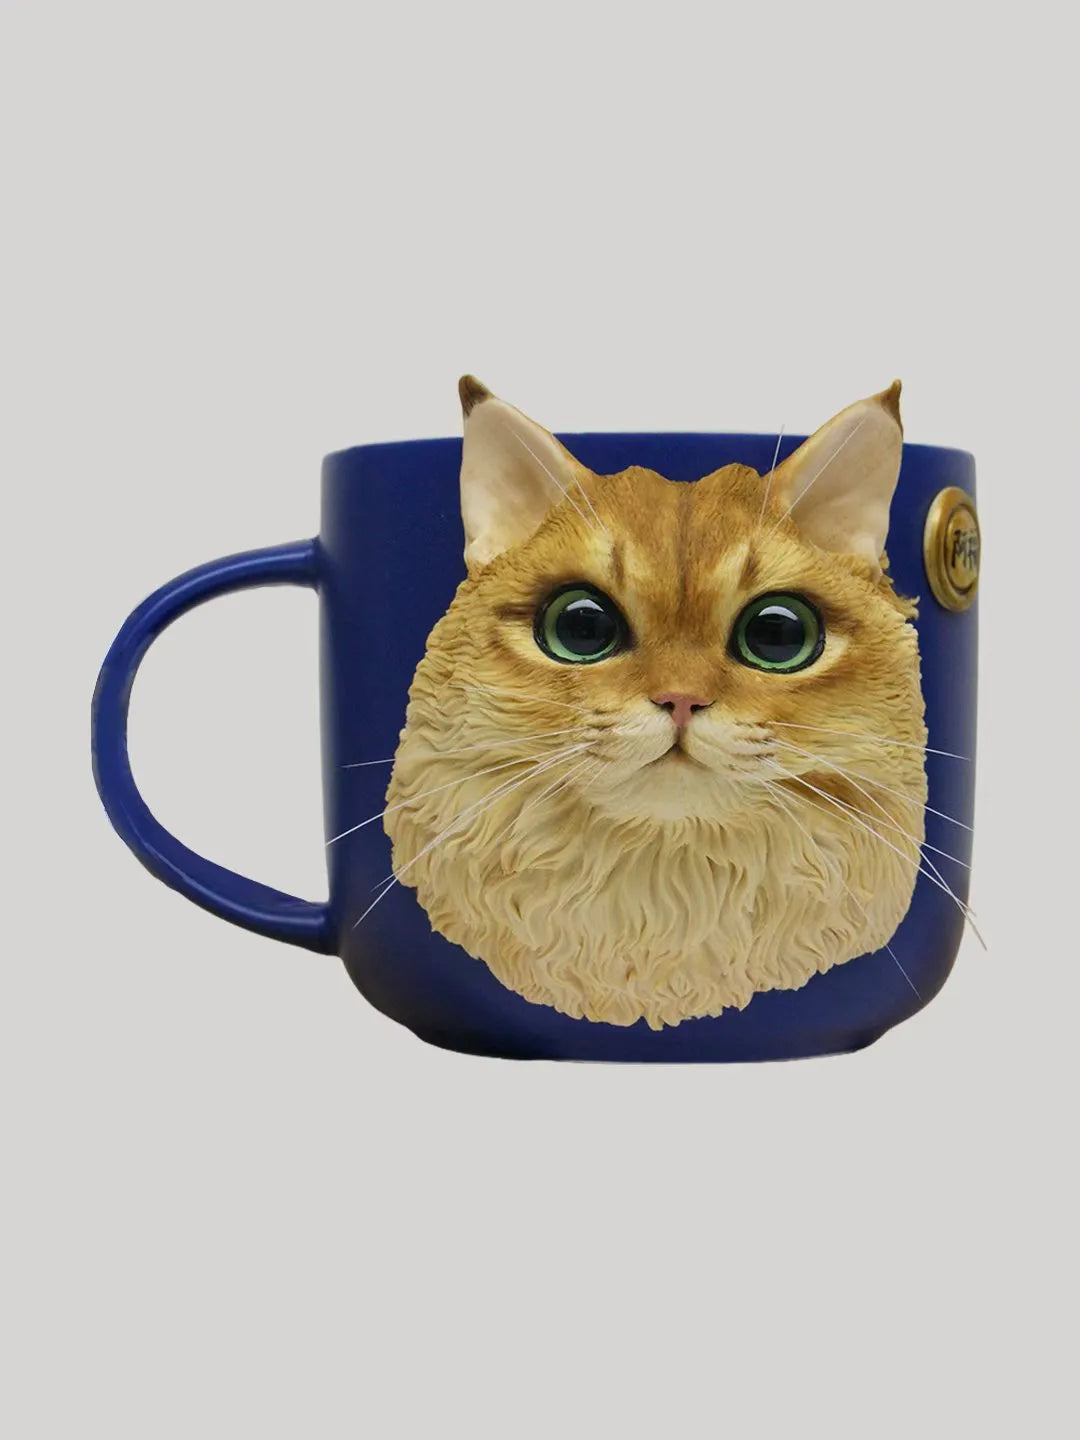
3D Custom Clay Pet Portrait Mug
The cat portrait is hand-shaped from baked clay and painted to reflect the pet’s face, coat, expression, and markings.
- Current listed price: $179.99
- Portrait style: Raised, dimensional clay portrait
- Material: Baked clay on a mug base
- Options: Face, full-body upgrade, or multiple pets
- Listed mug colors: White, black, blue, orange, and pink
- Customization: Made from your uploaded pet photo
| PetDecorArt Option | Best Use | Starting Price Checked | Size or Format | Official Product Source |
|---|---|---|---|---|
| Full-body wool-felt sculpture | Heirloom display, memorial, complete pose | $499.99 | 6–8 through 14–16 inches | Official product page |
| Framed 3D wool-felt portrait | Wall display, face detail, smaller rooms | $249.99 | Head or half-body; 6–16 inch frames | Official product page |
| 3D clay portrait mug | Personalized everyday keepsake | $179.99 | Raised clay portrait on mug | Official product page |
Prices, options, production schedules, and availability can change. Review the current product page before ordering, especially when the sculpture is needed for a birthday, holiday, or memorial date.
8. Drying, Baking, Painting, and Sealing
For Air-Dry Clay
- Place the sculpture on a flat, breathable surface.
- Allow it to dry slowly and evenly rather than placing it beside direct heat.
- Turn the piece when safe so the base is not trapped against a damp surface.
- Wait until the thickest areas are completely dry before sanding or painting.
- Fill small cracks with a compatible clay repair mixture and let it dry again.
- Apply thin acrylic-paint layers.
- Seal only after all clay, repairs, and paint are fully dry.
Dry-to-the-touch does not always mean dry through the center. For example, Crayola states that its air-dry clay generally takes about 24 hours to feel dry and about 72 hours to dry completely, with size and environmental conditions affecting the result. Use the instructions for your specific brand.
For Polymer Clay
- Read the exact temperature and time printed on the clay package.
- Preheat the oven and use an oven thermometer when recommended.
- Place the sculpture on an appropriate oven-safe surface.
- Shield delicate areas from direct heating when the manufacturer recommends it.
- Never cure polymer clay in a microwave.
- Allow the sculpture to cool fully before judging firmness.
- Paint and glaze with products tested for compatibility with the cured clay.
Sculpey notes that many of its products cure around 275°F, but times differ by formula and thickness. That is why the package instructions—not a universal internet temperature—should control your project.
A Simple Cat-Painting Order
- Base coat: Apply the cat’s main coat color.
- Large markings: Add white areas, masks, saddles, or broad patches.
- Midtone variation: Introduce warmer and cooler coat areas.
- Stripes and spots: Paint their direction and shape, not just their color.
- Face: Finish the eyes, eyelids, nose, mouth, and inner ears.
- Shadows: Add subtle depth beneath the chin, chest, legs, and tail.
- Highlights: Reserve the brightest details for the eyes and selected fur edges.
9. Common Cat Sculpture Problems and How to Fix Them
| Problem | Likely Cause | Best Time to Fix It | Practical Fix |
|---|---|---|---|
| The sculpture looks like a bear or dog | Round muzzle, small ears, or incorrect forehead profile | Before curing | Refine the wedge-shaped face, ear placement, whisker pads, and chin |
| The head looks too small | Body mass was built before checking the total silhouette | Before detailing | Add volume to the cheeks and skull or reduce the body visually |
| The eyes look crossed | Pupils or inner corners point toward each other incorrectly | Before and during painting | Mark both pupils lightly and compare them from several feet away |
| Ears keep breaking off | Thin ears or weak surface-only attachment | During construction | Use thicker ear bases and blend them securely into the skull |
| The tail cracks at the base | Sharp bend, thin connection, or unsupported weight | During construction | Widen the joint and let part of the tail contact the body or base |
| Air-dry clay develops cracks | Uneven thickness, rapid drying, weak seams, or excess water | During drying and after full drying | Dry more gradually, strengthen joins, and repair small cracks before painting |
| The paws appear to float | The base is uneven or the legs were attached at different lengths | Before curing | Press the figure gently onto a flat surface and re-level the paws |
| Fur texture looks messy | Random lines were added everywhere | While clay is workable | Smooth the area and reapply fewer marks that follow coat direction |
| Paint hides the sculpture detail | Paint was applied too thickly | During painting | Use several thin layers and let each layer dry before continuing |
| The figure tips over | Narrow base or head and tail extending too far from the center | Before curing | Widen the seated base and bring the tail closer to the body |
10. How to Display and Care for a Cat Sculpture
- Keep handmade sculpture indoors unless the material is specifically rated for outdoor use.
- Avoid prolonged direct sunlight, which may fade painted and textile surfaces.
- Place freestanding sculptures away from shelf edges.
- Keep them beyond the reach of real cats that may chew, paw, or knock them down.
- Dust with a soft, clean brush rather than saturating the surface with water.
- Lift the sculpture from its body or base, not by the ears, legs, or tail.
- Use a display dome for delicate full-body wool, clay, or mixed-media pieces.
Sealing an air-dry sculpture can improve surface protection, but it does not automatically make the piece waterproof. Crayola specifically notes that sealing its fully dried air-dry clay does not make it waterproof and recommends indoor display.
Frequently Asked Questions
What is the easiest material for making a cat sculpture?
Air-dry clay is usually the easiest starting material because it does not require an oven or kiln. Polymer clay is a better choice when you want a smaller sculpture with precise facial details and plenty of working time.
How much clay do I need for a cat sculpture?
A hollow 5- to 7-inch seated cat may use roughly 8–16 ounces of clay, depending on the body type, coat volume, and thickness of the clay layer. Building a compact foil core reduces weight and material use.
Do I need an armature?
A foil core is strongly recommended for medium-sized figures. Wire may be useful for a raised tail, standing legs, or another thin unsupported part. A compact seated cat with the tail resting against its body may not need a complicated wire skeleton.
How do I stop air-dry clay from cracking?
Keep clay thickness reasonably even, blend attachments securely, avoid adding too much water, and let the sculpture dry gradually rather than forcing it with strong heat. Small cracks can usually be filled after the figure is dry, then sanded and repainted.
Can I put air-dry clay in the oven?
Do not bake air-dry clay unless the manufacturer explicitly states that the product is oven-safe. Air-dry and polymer clays are different materials. Follow the package directions for the exact product you purchased.
How can I make the cat’s face look realistic?
Establish the head profile, eye spacing, cheek width, muzzle, nose position, and chin before adding fur texture. Compare the face from front, side, and three-quarter views, and adjust both eyes together instead of finishing one eye at a time.
Can I make a cat sculpture from only one photo?
You can create a stylized sculpture from one photo, but an accurate likeness benefits from front, side, three-quarter, full-body, and coat-marking images. Missing views require you to guess the hidden side of the cat.
How long does a DIY cat sculpture take?
A simple figure may require several hours of sculpting, followed by drying or curing, repairs, painting, and sealing. Air-dry projects often extend across several days because the clay must dry completely before finishing.
Is an air-dry clay cat sculpture waterproof?
Generally, no. A compatible varnish can improve surface resistance, but many air-dry clays remain sensitive to moisture even after sealing. Treat the finished cat as indoor decorative art.
Should I sculpt or paint the cat’s fur?
Use sculpted texture for changes in fur volume, such as cheek fluff, chest ruffs, and thick tails. Use paint for stripes, spots, subtle color transitions, and individual fine hairs. Combining both methods usually looks more natural than carving every strand.
Can children make a cat sculpture?
Children can make a simplified air-dry cat with appropriate supervision. Adults should handle craft knives, sharp tools, wire, sanding, sealers, and oven curing. Always follow the age and safety guidance on the chosen materials.
What is the best pose for a first cat sculpture?
A seated cat with both front paws on the base and the tail touching the body is the most manageable. It has a wide support area, fewer fragile raised parts, and a silhouette that remains recognizable even with simple detail.
Turn Your Cat’s Photo into Lasting Art
Create your own clay figure using the steps above, or compare handmade PetDecorArt options when you want a professionally crafted likeness.
View Custom Cat Portrait Options Browse All Pet Portraits Read the 3D Cat Art GuideProduct prices, specifications, images, and production details were checked against PetDecorArt’s official pages on June 16, 2026. Material instructions vary by manufacturer; always follow the current directions printed on the clay, paint, glaze, and sealer you use.


